Getting a professional facial is a delicacy. There’s nothing like
being pampered in a cozy treatment room bed—the steam, the thorough pore
cleaning, and we can’t forget the facial massage!
The only
downside is that these facials are expensive. (That, and it can be hard
to find spas that use pure and natural products.)
Experts
recommend you get a facial every 4-6 weeks, but that can be hard to
work into your budget.
Facials are an essential key to healthy, glowing
skin. By regularly performing at-home facials you can even out the look
of your skin tone, enjoy deep cleansing benefits, and experience overall
rejuvenation. Giving yourself a facial is a gorgeous form of self-love
(and a great way to get to know your skin).
Below is a
step-by-step guide to how to do an at-home facial treatment. It’s
simple, effective, and super pampering. So grab your favorite robe, sit
back, relax and feel beautiful!
How to Do an At-Home Facial
1. Cleanse
The
first step of your facial is the most important. Cleansing removes
dirt, oil and makeup to give your skin a “clean slate.” This allows all
other products to penetrate optimally into the deeper layers of the
skin.
Technique: The way you wash your face matters. It’s common
that after a long day you want to jet through the cleansing process and
go to bed as soon as possible. I’m here to tell you that this step
(especially during a facial treatment) should be emphasized and
performed for at least a few minutes.
Start by rinsing your face
with lukewarm water. Apply a dime-sized amount of cleanser most suitable
for your skin type
and begin manipulating the wash in upward, circular motions with your
middle and ring fingers. Medium pressure is good here, as this will help
to stimulate and give your facial muscles a lifted and toned
appearance. Rinse with lukewarm water and gently pat your skin dry with a
washcloth. (Repeat if necessary when wearing heavy makeup.)
2. Exfoliate
Now
that your face is squeaky clean, it’s time to exfoliate. Exfoliating is
imperative for creating a healthier, smoother appearance.
This
not only helps with evening out the look of your skin tone, but also
with refining the look of your pores, smoothing out the appearance of
fine lines and wrinkles and improving your skin’s feel. Exfoliating also
greatly increases product penetration.
Technique: Apply a dime-sized amount of scrub, such as Scrub,
to the skin and then use upward, circular motions with light pressure
for 1-2 minutes. If you prefer, you can use a chemical or enzymatic
exfoliation like a fruit acid peel.
3. Steam
When
steam enters the facial, this is when the home spa vibe really gets
going. To me, steam is the most relaxing and cleansing part of a facial.
It opens the skin follicles (pores).
How to steam: The easiest
way to steam is to bring water to a boil in a large pot. Take a towel
and drape it over your head and slowly lean your face over the pot so
that your face is directly over the steam. (Be careful to not get too
close!) It should feel warm, not hot.
Get creative with your
steam—add rose petals, rosemary, thyme, or any other herbs. A few drops
of essential oils are lovely, too!
Steam for 10-15 minutes, with
intermittent breaks if you need. If you have sensitive skin or rosacea,
steaming may not be ideal for your skin type.
4. Extractions
Note: Extractions should only be performed on
blackheads, which are typically found in the T-zone area (forehead,
nose, chin). Blackheads are oxidized sebum (oil) that show up as black
“dots.” Blackheads are open comedones. Pimples, also known as
whiteheads, are closed comedones, which you should never attempt to
extract/squeeze as this could exacerbate inflammation, cause breakage in
the skin, and result in scarring.
How an Professional Extracts
Blackheads: Extractions should only take place after steaming the skin
because steam helps to open the follicles and soften the oxidized oil in
them. To extract, they wrap a tissue around each index finger and
carefully place one finger on each side of the blackhead pushing down
gently with a slight “squeeze.” The blackheads should come out easily.
If they do not, leave them alone to avoid further irritating the skin.
They may also use blackhead removal tools.
5. Treatment Mask
After
all of those deep cleaning steps it’s time for some pampering. Now you
can relax and give your skin some tender loving care! The treatment mask
is the heart of any facial. This is when your skin is most ready to
receive yummy nutrients since it’s just been cleansed, exfoliated and
steamed.
Choose a mask most suitable for your skin type. Coconut Honey Mask is excellent for dry, mature and normal/sensitive skin types, while Purifying Mud Mask
is ideal for oily and normal/combination skin. Apply your mask and
leave it on for 15-20 minutes. (Now would be the time to place cucumber
slices on the eyes if you really want to get into it!) Remove with a
warm washcloth and splash skin with cold water.
6. Tone + Treat
Continue by applying the same steps you’d complete in your daily facial routine. Plug in your favorite toner . Mist and let skin dry before applying your favorite serum. I love the cooling feeling and deeply hydrating effects.
7. Moisturize
Let’s
put some pep in this final step and seal in that bona fide beauty.
Moisturizing is an essential step for the face and around the eyes, so
pick your favorite oil or cream and massage deeply into the skin for 1-2
minutes. Facial massage is a great way to tone and lift the appearance
of the skin, relieve tension, and drive the oils in deeper, giving your
skin layers and layers of love. Finish with a spritz of toning mist, as
this will also push the facial oils into the skin more effectively.
And there you are! You’ve just given your skin a beautiful at-home facial.
How do you pamper yourself? What other tips can you share with us for an at-home spa treatment?
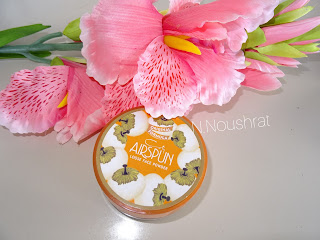
HEY BEAUTIFULL, I hope winter is treating everyone well. So recently, I have gotten into the no-makeup makeup trend which is those days when I stick to my BB or CC cream, mascara, lip gloss, and a setting powder. Not many powders really conceal blemishes but I really wanted to find something that did give good coverage and at least minimized few blemishes. I wanted something budget friendly and while I was on the search, I found the Coty Airspun Loose Face Powder. This is quite a famous one with many beauty gurus and I thought I should give it a try. Read on to know how this powder fared! SCENT It is heavily scented, which can be a downside for some. I actually really like the smell of it. At first, it does seem a little too potent, but within 15-20 seconds the scent does disappear. I own the original NATURALLY NEUTRAL version, but there is a Translucent Extra Coverage which obviously adds extra coverage onto your skin when set, and there are limited shades...
As a beauty blogger based in Mauritius, I certainly admire just how successful Huda has become and with her beauty line expanding - I couldn't wait any longer and figured I should sit down and dedicate a solid article to it. If you want to hear my candid review, then please keep on scrolling. Overview As you all do know by now, Huda Beauty offers a great variety of high quality false eyelashes, nails and now lip liners or Lip Contour Matte Pencil (which they are marketed as) . In this post I will be actually reviewing both: her newest lash models, as well as Lip Contour. Eazy Lash Collection Huda came up with an idea of creating a brand new and somewhat petite collection of easy and yet relatively dramatic lashes, which would be user-friendly for even make-up beginners or women, who (for example) want to upgrade their make-up game - but still keep the actual application process as hassle-free as possible. There are currently only two lash models a...
Not only is winter the time to employ preventative skin care to protect against the cold, dry elements of the season, it’s also a great time to undo the damage incurred during all your outdoor summer activities! In the wintertime, your skin needs your attention. The cold can take a toll on our epidermis, and we want to make sure we take precautions to protect and care for it. The most important gift you can give to your skin in the wintertime is extra moisture, because it’s craving it. Here are some winter skincare essentials that your skin will thank you for. Protective moisturizing oil There are many different natural oil products out there. The theory behind putting extra oil in your skin in the wintertime is to replenish and revitalize dry skin; this is particularly important if you have eczema. Don’t be afraid to put natural carrier oils on your face! They don’t clog pores and they absorb quickly into the skin . For example, I use my Moisturizing Fac...

Comments
Post a Comment